How to Make a 3D Birthday Card: Read the Four Lines Under the Paper List
Everyone reads the paper list. Almost nobody reads the four lines under it. Those four lines are where a 3D birthday card tells you what it actually does: fishing line means it spins, a velcro dot means it stays shut, wooden dowels and fairy lights mean you are no longer making a card.
This is how to make a 3D birthday card without discovering at eleven at night that the design needed foamcore. Four builds below, from one bottle of glue up to hardware.
Quick answer
Cut the paper, then assemble in layer order from the PDF legend, using foam squares wherever a piece is meant to float above the one beneath it. The part that decides your evening is not the cutting. It is the short non-paper list at the bottom of the supply sheet: glue only, or glue plus a mechanism, or glue plus structural material you have to buy. Check that list before you buy the file.
Where to start: the Carly Greeting Card legend names all eighteen sheets before you open a paper drawer, which is the fastest way to see whether tonight is realistic.
The last four lines of the supply list are the specification
Layered card files from a studio come with two lists stacked into one. Above: cardstock, by name and sheet size. Below, in smaller type and easy to skim past: everything that is not paper.
Compare two designs that both finish at 7 high by 5 wide. One ends with glue and optional foam squares. The other ends with hot glue, scotch tape and blue string or fishing line. That string is the drive belt for a record that spins when the card opens. Same cutting time, same mat count, completely different build.
Foam squares are not decoration. They are the reason a layered card has depth at all, and a design that lists them is telling you which layers are supposed to sit above the others rather than flat against them.
The assembly order that stops layers going on crooked
Every one of these downloads includes a PDF legend that names each piece and a step by step video. The legend is not a packing list. It is the order.
Work from the back panel forward, glue flat pieces flat, and reserve the foam squares for the pieces the preview photo shows lifted. Dry fit a layer before any adhesive touches it, because on a card at this scale a piece placed two millimetres off is visible from across the room. Rhinestones, ink edging and pearls go on last, after the card closes properly, since a card that will not shut is a structural problem and no amount of embellishment hides it.
Cardstock weight is part of the method: these designs are built around 80 lb cover, roughly 216 gsm. Lighter stock cuts more sweetly and then refuses to hold a raised layer.
Foam squares only earn their place where the preview shows a piece lifted, and the legend is where that is written down. The Platinum Record Spinner names its pieces the same way, so the guessing happens on screen rather than with glue in hand.
Four builds, from glue only to hardware
Four is how many published a complete non-paper supply list, which is the whole basis of the comparison. Files that stop at the cardstock are not in the list, however good the preview looks.
Level one: glue and foam squares
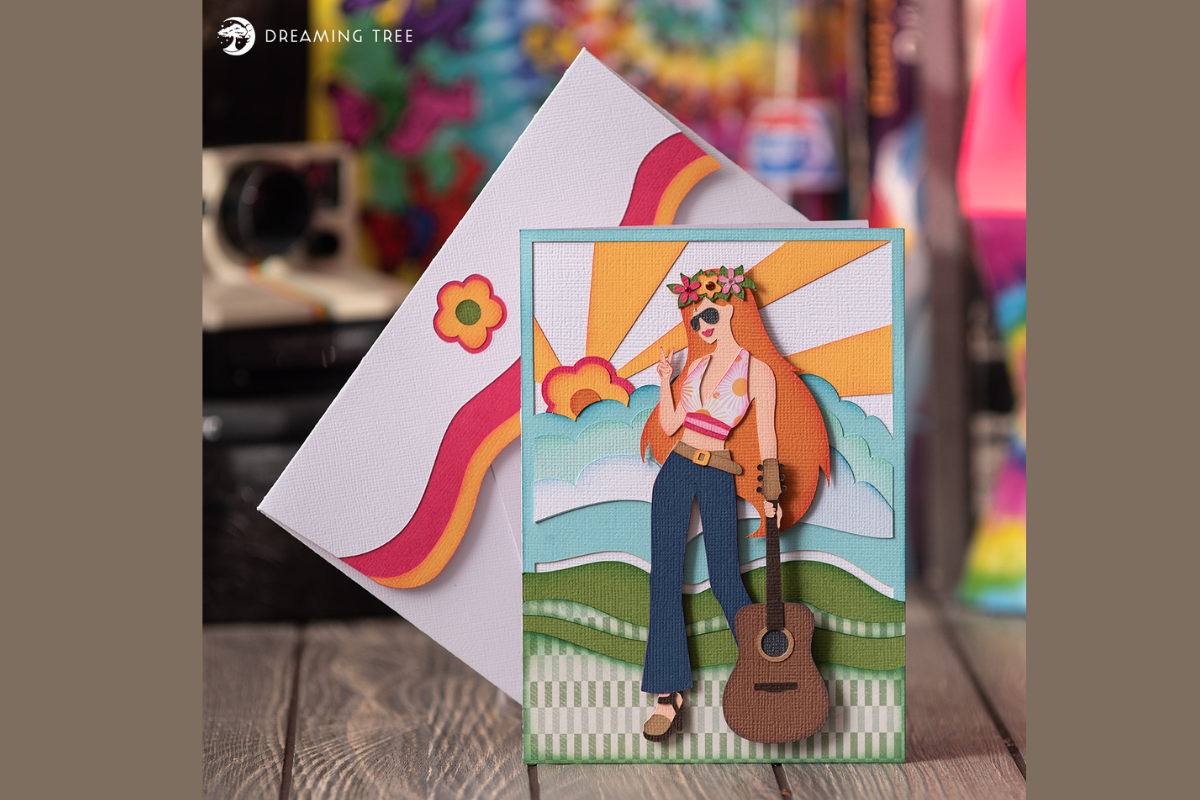
Carly Greeting Card SVG
A seventies-styled layered card, 7 high by 5 wide by 0.125 deep, from eighteen sheets. Non-paper list: glue, plus optional foam squares, ink, rhinestones and a white or black pen for edging. Nothing mechanical, nothing structural. Two of its sheets are patterned paper from a named designer stack and one is black pearlescent, so the shopping happens on the paper side rather than the hardware side.
Best if this is your first layered card and you want the technique without a mechanism to get wrong. Not for you if the recipient expects the card to move.
Level two: a closure
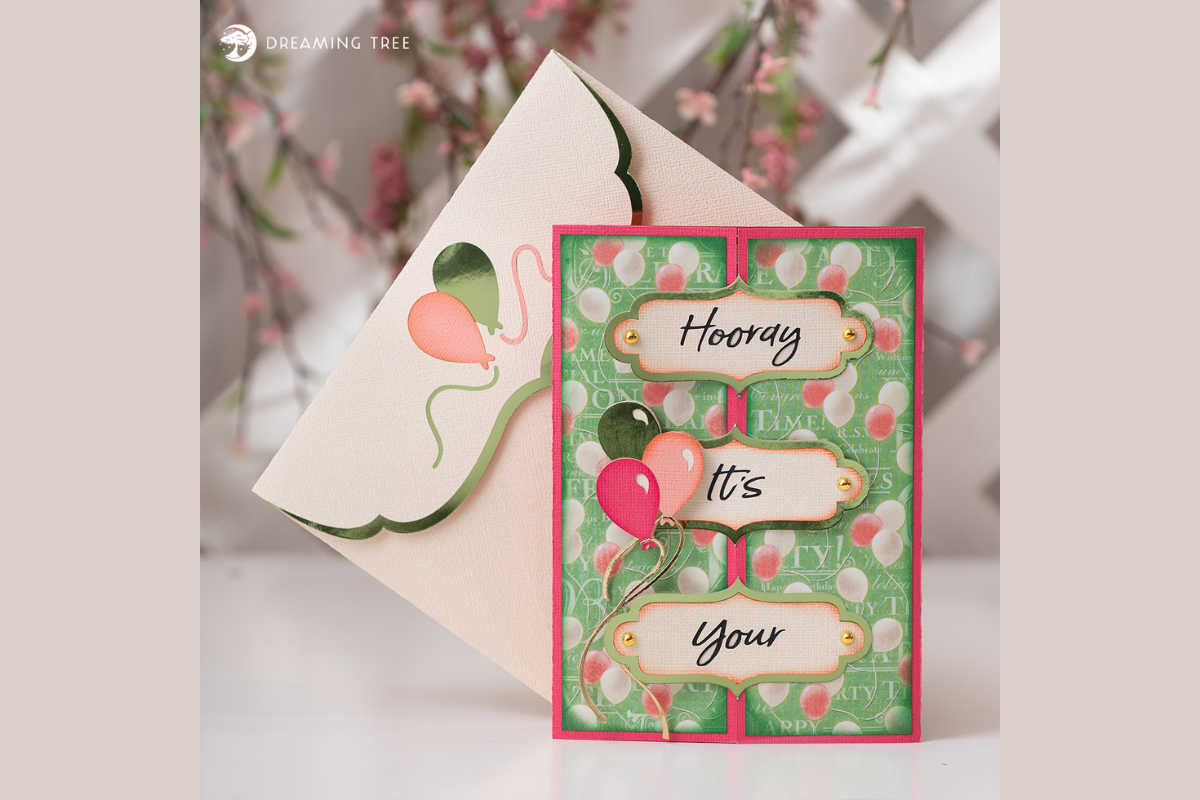
Hooray Birthday Card SVG
A gatefold that opens to reveal the word Birthday, 7 high by 5 wide by 0.25 deep, envelope included in the download’s extras folder rather than beside the card file. Nine sheets, two of them foil and two patterned from a named celebration stack. The non-paper line adds one thing to glue and foam squares: a velcro dot, three eighths of an inch across. A gatefold has no spine to hold it closed, so without that dot the card sits open in the envelope and creases.
Best if you want the reveal moment and are happy sourcing two foil sheets. Not for you if you are posting it in a thin envelope, because a quarter inch of depth plus a gatefold is a bulky mail item.
Level three: a moving part
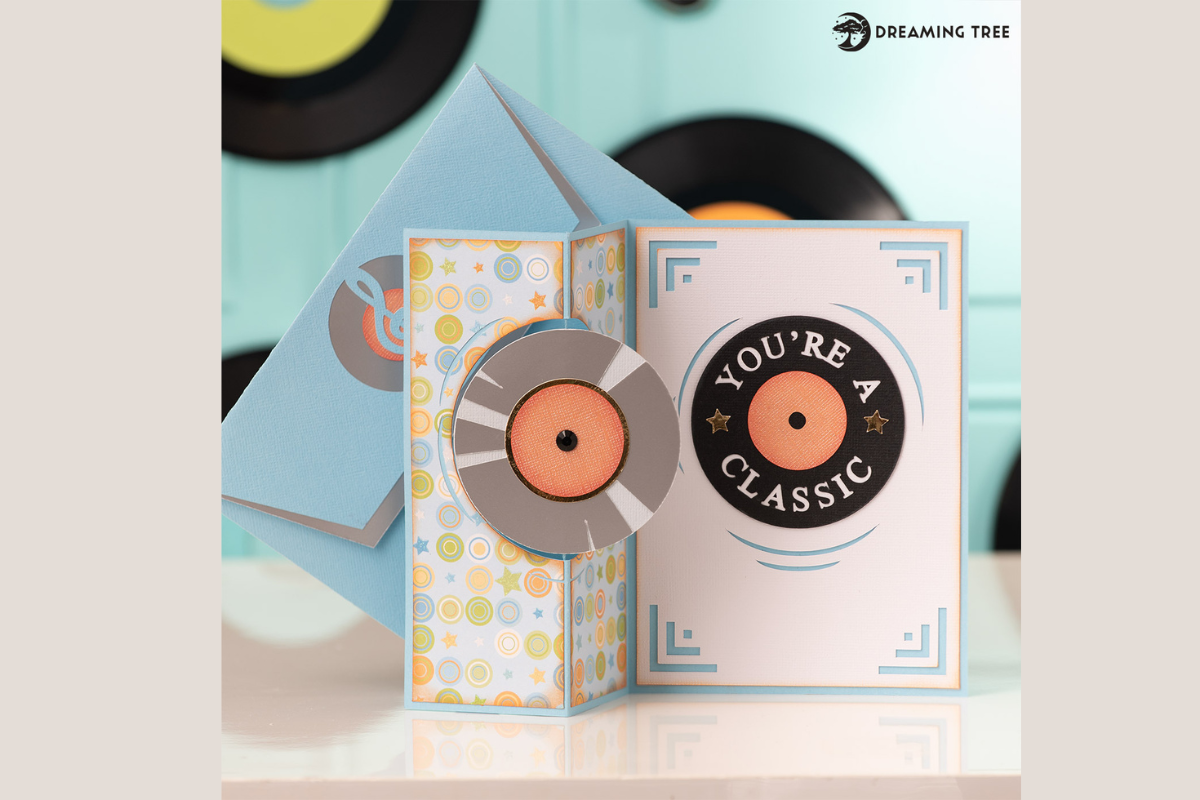
Platinum Record Spinner Card SVG
A vinyl record that winds up and spins when the card opens, 7 high by 5 wide by 0.125 deep, envelope included. Nine sheets including matte silver foil, mirror gold foil, orange pearlescent and one sheet from a named glitter stack. The non-paper list is where this one lives: ink and rhinestones optional, then blue string or fishing line, scotch tape, hot glue and ordinary glue. The string is the mechanism. Substitute thread and the record will not carry the wind.
Best if the birthday belongs to someone who will open it twice to watch it again. Not for you if you have never used hot glue near a paper hinge, since that is the join that fails.
Level four: structure, dowels and lights
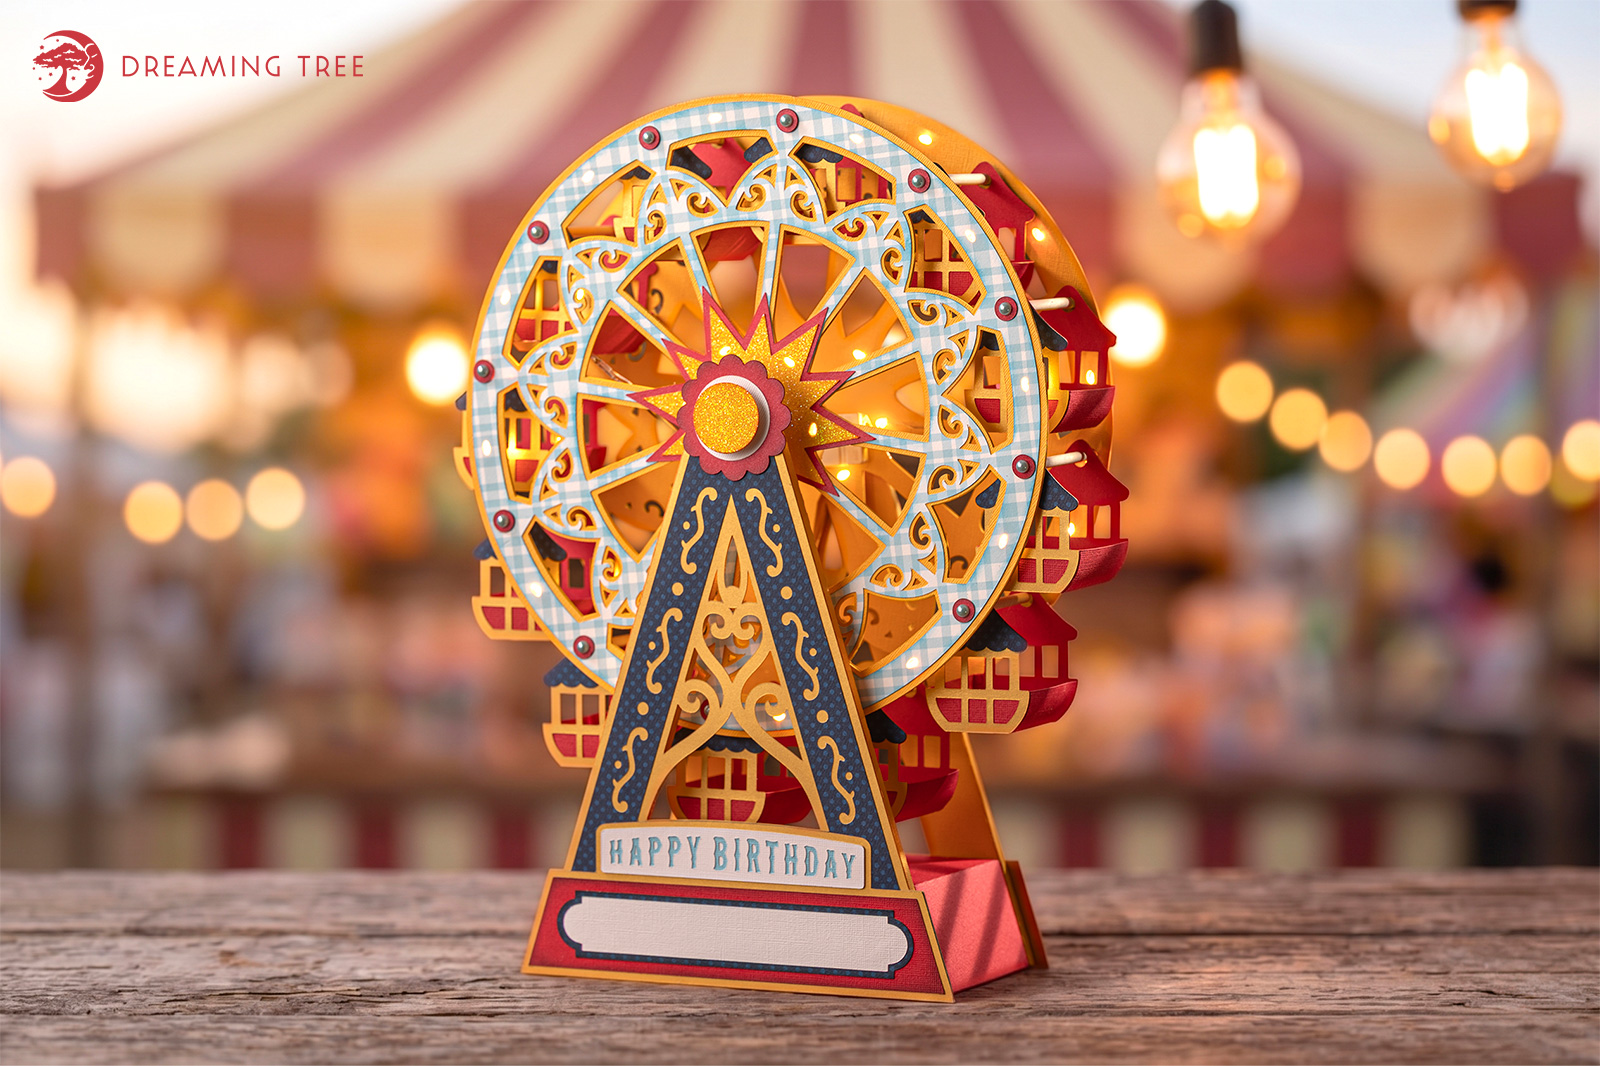
Midway Ferris Wheel
A layered carnival wheel with a Happy Birthday sentiment banner, sold as a centrepiece that doubles as a card. Thirty sheets: fourteen of lemon twist, five of red currant, four patterned, three gold pearlescent, plus forget me not, snowy white, red pearlescent and yellow glitter. Then the list that changes the project: foamcore three sixteenths of an inch thick, wooden dowels three sixteenths by twelve inches, hot glue, and fairy lights with at least twenty bulbs spaced no closer than three inches. Two of those four are not craft-drawer items.
Best if the card is the decoration and you have a weekend rather than an evening. Not for you if it has to go in an envelope, because at this scale nothing about it posts.
What the whole pool asks for, and one design left out
Counting across thirty-seven vetted paper card files from this studio: thirty-one publish a supply list at all. Of those, sixteen call for foam squares, six for hot glue, four for acetate, three for a velcro dot, and exactly one asks for foamcore, wooden dowels and fairy lights. The hardware tier is not a tier so much as a single build.
The Retro Gamer Shaker card was the obvious fifth entry and is not on the ladder. It needs acetate, which puts it in a different family: a shaker holds loose pieces behind a window rather than stacking layers, and its page does not state a finished depth. A comparison sorted by what the build demands cannot place a design whose build is a different thing altogether.
Where a free 3D card file runs out
The instructions are the product. Cut lines are easy to give away; a legend that names every sheet, an ordered assembly video and a stated list of what else you need are the parts that take a studio to produce.
| What you need to finish it | Free file | Studio file |
|---|---|---|
| Non-paper supplies named | Almost never | Listed, including optional items |
| Layer order | Work it out from the photo | PDF legend plus video |
| Which pieces sit on foam | Guesswork | Implied by the supply list and shown in the video |
| Mechanism parts for a spinner or gatefold | Not mentioned | Named down to the string and the dot |
| Finished depth before you buy an envelope | Rarely stated | Stated on the product page |
Browse 3D birthday card files with full supply lists
To sort the same pool by how many paper colours each card wants, see 3D birthday cards you can finish in one evening. If the card is floral and you are weighing pattern paper against solids, that split is in 3D flower birthday card files sorted by the paper you have to go buy.
Questions people ask partway through
| What the supply list names | What it means for the evening |
|---|---|
| Glue only | Paper on paper, one sitting |
| Foam squares | Layers that lift, still one sitting |
| Hot glue, velcro dot, fishing line | A mechanism to assemble and test |
| Foamcore, dowels, fairy lights | A centrepiece, not a card |
What glue should I use on a layered card?
These lists distinguish between glue and hot glue for a reason. Ordinary craft glue is for paper on paper. Hot glue turns up only where something structural or mechanical has to hold, and used on a thin decorative layer it warps the piece.
Do I really need foam squares?
If the design lists them, yes. They are what makes a layered card three dimensional instead of a collage. Skipping them gives you a flat card with more steps.
How long does one of these take?
Sheet count is the honest proxy. A nine sheet card is an evening. A thirty sheet build with dowels and lights is a project you come back to.
Can I resize a design to use less paper?
The studio permits resizing and states that finished dimensions will differ from the published ones. What it does not change is the sheet count, since the pieces still have to be cut. Smaller pieces also get more fragile, so the fine layers tear on removal.
Why does my card not close flat?
Usually a layer glued where it should have been foamed, or the other way round, and on a gatefold usually the missing closure. Check the design for a velcro dot in the supply list before assuming the fold is wrong.
What can I do with the leftover cardstock?
A thirty sheet build leaves offcuts of named colours you probably bought for it alone. Those are the sheets to spend on a single layer card in the same palette rather than letting them sit as a half-used pack.
Will these files work with my Cricut, Glowforge or Silhouette?
All four are cut files, not laser files, so they open in Design Space, Silhouette Studio or Cricut Design Space the same way. Nothing here calls for engrave settings. The only machine-specific detail that matters is blade depth for 80 lb cover cardstock — check your machine’s setting for heavy cardstock before the first cut, not after a sheet is wasted.
Still choosing which build to take on first? The Midway Ferris Wheel carries the longest supply list on this page and reads as the honest stress test of a paper drawer.
Key takeaways
- Read the non-paper lines before you buy. They are the specification, not an afterthought.
- Glue only means an evening. Fishing line, velcro or hot glue means a mechanism. Foamcore and dowels mean a centrepiece.
- Foam squares create the depth. A design that lists them is telling you which layers float.
- Assemble back to front, dry fit before glue, embellish only after the card closes.
- Eighty pound cover cardstock holds a raised layer. Lighter stock cuts easier and then collapses.