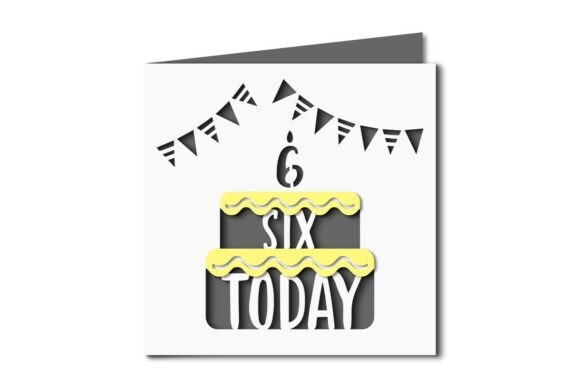
Your birthday cake pop up card will tear in one of two places: at the end of a cut that ran past the fold line, or on a fold that was bent hard without a crease first. You can avoid both with an insert of 80 to 120 gsm paper, a pencil dot at the end of every cut and a close-and-open test before any glue.
If you are working out how to make a simple birthday cake pop up card tonight, with no spare sheet for a second try, this birthday cake pop up card diy puts the risk where it belongs, before the scissors, not after.
Of three step-by-step tutorials for this card that rank on page one, none uses the words tear, torn or rip, and only one names a paper weight at all, so you are left to find out the hard way.
Quick answer: a pop up cake card that springs without tearing.
- Insert paper: 80 to 120 gsm, plain office paper or light cardstock.
- Cover paper: 176 to 216 gsm is fine, because the cover has no moving parts.
- Tier depths: 5, 3.5 and 2 cm from the fold, widest tier at the bottom.
- Cuts: four for two tiers, six for three, each one stopped on a pencil dot.
- Before glue: slide the insert into the cover, close it, open it, and check that every tier stands up by itself.
If you would rather not cut by hand at all, the Pop Up Butterfly Birthday Card SVG comes as a cut file with a PDF for manual cutting.
What tears a pop up cake tier and what does not
A tier is a strip of paper between two parallel cuts. You fold it back and push it inside the card, so it stands up when you open the card.
Everything that matters happens at the two ends of that strip and along the fold between them.
The rip starts in one of two places:
- The end of a cut. If your scissors go even slightly past the line where the strip folds, the paper has nothing left to hold the corner, and it splits further the first time you move the strip.
- The fold of the strip. When you bend it in one hard push with no crease first, the paper fibres on the outside of the bend stretch and crack.
What does not tear a tier is the pattern on the cover, the glue on the flat margins or the shape of the cake.
I read that as good news, because you only have three small decisions to make: which paper, where the cut stops and how you make the fold.
If you would rather skip them, a cut file such as the Pop Up Butterfly Birthday Card SVG has the strips drawn for you.
You can make a cut longer with one more snip, but you cannot make it shorter. Stop early and finish with a snip, never the other way round.
Paper that holds the fold
Two papers go into this card, and they do different jobs. Your cover is a folded sheet with no mechanism, so it can be as stiff as you like.
Your insert carries the strips, and the strips have to bend back twice without cracking.
For kids’ card-making, where the first sheet is often the only one, this matters twice as much.
| Part | Weight | Why |
|---|---|---|
| Cover | 176 to 216 gsm | Only the main fold bends, so it can be stiff |
| Insert | 80 to 120 gsm | Every tier folds back and forth, and a thin sheet takes it without cracking |
| Cake decoration | Any, glued on flat | It sits on the surface of a tier and does not fold |
Some tutorials quote the weight in pounds.
An 80 lb cover is about 216 gsm and a 65 lb cover is about 176 gsm, so you should read those figures as cover weights.
If you put a 216 gsm sheet in as the insert, the strips resist the fold, crack along it, and the tier will not close flat.
The Tiny Tots Birthday Pop Up Cards SVG Bundle is drawn for children’s cards and assumes the same split of light insert and stiff cover.
Check the grain before you cut. Bend the sheet in half one way, then the other way.
Whichever direction feels softer and straighter runs with the grain, and I lay the tier fold along it.
Your card is an A6 sheet folded in half, about 10.5 by 14.8 cm, and you cut the insert a few millimetres smaller so a margin of cover stays visible all round.
Mark it once, cut it right
Fold your insert in half, crease it hard, and keep it folded for the next steps.
That fold is the spine of the card, and every cut starts on it and goes inward.
Take a ruler and a pencil, and mark the depth of each tier on the fold itself. I use a soft pencil, so you can rub the marks out later:
- Bottom tier: 5 cm in from the spine, the widest and deepest.
- Middle tier: 3.5 cm.
- Top tier: 2 cm.
Next, mark the width of each tier on the edge of the paper, then draw a short line from each mark toward the middle.
Last, put a pencil dot at the end of every cut, on the line where you will fold the strip.
If you want the widths worked out for you, the Baked with Love Card SVG shows a layered cake front you can measure against.
The dot is the whole trick. Your scissors stop on it, not beyond it.
If the strip does not yet fold cleanly, one more small snip finishes the cut, and you lose nothing.
You can cut a millimetre more, but you cannot uncut a millimetre.
Four cuts and the reverse fold
Two tiers need four cuts, a pair for each tier, and a third tier adds a pair, which makes six.
I start with the deepest pair and work toward the shallowest, so the paper in my hand stays as stiff as possible.
Cut slowly, with the sheet still folded and the point of your scissors aimed at the dot. Stop on it.
If your hand shakes on a 2 cm strip, a cut file such as the Pop Up Butterfly Birthday Card SVG does that part with a machine, or you can print its PDF and cut by hand.
Now the fold of the strip, which is where most tiers fail:
- Open the insert flat and lay a ruler across the two dots of one tier.
- Press a fingernail, or the blunt back of a knife, along the ruler. This crease is made first so the fold has a path to follow.
- Fold the strip toward you along the crease, then turn it the other way so it points into the card. That is the reverse fold.
- Close the insert and press the card flat with a flat hand. The strips should now sit inside as small steps.
- Repeat for each tier.
Do not force a strip that resists. If one does, your crease is off the dots, or the paper is too heavy.
Unfold it, redo the crease with the ruler and try again. A strip creased twice along the same line holds better than a strip you bent once, hard.
Test the spring before any glue
This is the step the tutorials leave out, and it is the one that saves your card.
Slide the insert into the cover without glue, close the card and open it. Do that three times.
- Every tier stands up on its own: good, your geometry is right.
- One tier leans or stays flat: that tier is too deep for the insert, or its crease is off the dots. Shorten it by creasing again a little nearer the spine.
- A white line appears along a fold: the paper is cracking. Stop opening and closing, and read the next section.
You add glue only when the test passes, and it goes on the flat margins of the insert and the inside of the cover.
Keep glue off the folds of the strips, or the tier cannot move.
Add the candle and the decoration last, flat on the face of each tier, and let it dry under a book before you close the card.
For a cake front to copy, the Baked with Love Card SVG is a good reference.
If you have a second sheet, mark it before you glue anything.
I trace the first marked sheet on tracing paper, so the same dots serve every later try, and a spoiled sheet costs me a few minutes, not the whole evening.
See also the guide to birthday paper crafts you can finish the night before, and the rest of the pop up birthday cards you can cut, fold and post the same day.
A third tier, and the 3D cake that still closes flat
A two tier cake is the safe build. A third tier is what people mean when they search for a 3D pop up birthday cake card, and it fails for a reason that has nothing to do with tearing.
The strip has to fit inside the closed card. Your A6 cover is about 10.5 cm wide from the spine to the open edge, so the deepest tier can only go so far in.
- Keep the deepest tier under half the cover width. At 5 cm on a 10.5 cm cover you have room to spare, and the tier lies flat when you close the card.
- Step the depths down, not the widths alone. 5, 3.5 and 2 cm gives each tier its own shelf, so the top tier is still visible over the one below it.
- Leave 1 cm of flat paper above the top tier. That strip is what the glue holds, and a tier cut too near the top edge has nothing to sit on.
I build the third tier last and I test after each one, because a tier that leans is cheaper to fix while the two below it are still unglued.
Past three layers the mechanism changes from strips to a stacked box, and that is a different build. Our guide to the 3D birthday cards you can cut and fold in one evening covers that shape.
For a cake front with the layers already drawn to step correctly, the Baked with Love Card SVG gives you the proportions to copy.
When the tier is already torn
A torn tier is not the end of your card, as long as only one has gone.
- One tier torn: glue a strip of paper, about 1 by 3 cm, on the inside of the tier along the fold line, let it dry and decorate over it with a candle or a frosting piece.
- Two or more torn: replace the insert. A patched tier holds, but two patches in a row usually mean your paper is too heavy or your creases are off the dots, and a third try on the same sheet fails the same way.
When you start again, check the weight first, mark the dots again from the traced sheet and test before glue.
The Tiny Tots Birthday Pop Up Cards SVG Bundle is also worth a look if the card is for a child and you want a ready-made shape.
For more ideas on card paper, the guide to handmade birthday cards by paper weight covers the cover stock, the guide to 3D flower birthday cards on specialty paper covers papers that crack, and the 3D birthday cake card shows a different build for the same cake.
When the paper is too heavy: the pull out cake card
Sometimes the only cardstock in the house is the stiff kind, and every strip you crease cracks. You do not have to give up on the card.
A pull out cake card moves the cake instead of folding it. The cake sits on a tab that slides out of a slot in the cover, so nothing has to bend back on itself.
- Cut a slot in your cover, about 6 cm long, where the top of the cake will appear.
- Cut the cake shape and a tab under it, one piece, from the same heavy stock.
- Push the tab through the slot from the inside, so the cake hides behind the cover.
- Glue a paper stop across the bottom of the tab so it cannot come all the way out.
- Pull the tab and the cake rises above the slot.
I reach for this one when the recipient is small and likely to tug at the card, because there is no crease to crack and no tier to flatten.
The trade is movement for depth. A pull out cake is flat, so it reads better with a drawn or layered front than with a folded one.
The Tiny Tots Birthday Pop Up Cards SVG Bundle is drawn with layered fronts you can lift onto a tab, and the supply list for a 3D birthday card tells you what stock you actually need to buy.
When scissors are the problem: cut files for a pop up card
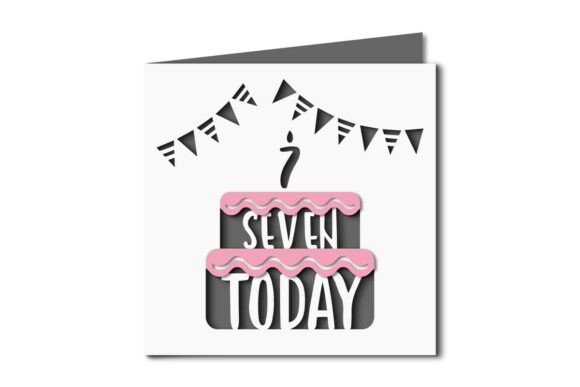
Hand cutting asks you for steady scissors on a 2 cm strip, and a cutting machine takes that away.
A cut file gives you the same strips with the creases already scored, and if you have no machine, a PDF lets you print the pattern and cut by hand.
Unlimited creative assets. Access to AI tools.
Commercial licence included.
Browse all
Pop Up Butterfly Birthday Card SVG
SVG, DXF and PDF files for a Happy Birthday pop up card. Cut with a machine, or print the PDF and cut by hand.

Tiny Tots Birthday Pop Up Cards SVG Bundle
Three animal pop up cards for children, each one a layered 3D card cut from a single file. Suits a kid’s birthday.

Baked with Love Card SVG
A baking themed layered card for birthdays and thank you notes. Suits a cake card for someone who loves to bake.
A cut file does not replace the test. You still slide the insert into the cover without glue and open it, exactly as above, before you stick the card together.
Our guide to the 3D birthday cake card shows what to do with the finished cake.
A template you print, and three things to check first
A downloaded template saves you the marking, which is the slow part. It also brings a new way to ruin the sheet, and the fault is nearly always the print dialog.
Check these three before you cut anything:
- Scale. Set the print to actual size, never to fit to page. Fit to page shrinks the whole sheet, and your 5 cm tier comes out a few millimetres short of it.
- Paper size. An A6 insert fits inside both Letter and A4, so either tray works, but the template has to be set to the tray you loaded or the margins shift.
- Score lines. Look for the dashed lines that mark where each strip folds. A template with cut lines only leaves you to guess the crease, which is the fold that cracks.
Then measure one tier with a ruler on the printed sheet. If the deepest tier reads 5 cm, your scale was right and the rest of the sheet is right with it.
I print on the thin insert stock rather than the cover stock, because the template belongs on the sheet that carries the strips.
If the printer is cropping your margins, the guide to birthday invitation templates that print without cut edges fixes that for every printable on this site.
A file that arrives with its score lines already drawn skips all three checks. The Pop Up Butterfly Birthday Card SVG ships a PDF with the folds marked, and the guide to free pop up birthday card SVG score lines explains how to read them.

Questions people ask about a pop up cake card
How do I make a simple birthday cake pop up card?
Fold an A6 card and a slightly smaller insert, mark tier depths of 5, 3.5 and 2 cm on the insert fold, cut each pair of cuts to a pencil dot, crease and reverse fold the strips, test without glue, then glue the margins.
Why does my pop up card tear when I fold the tier?
Usually the cut ran past the fold line, or the strip was folded hard without a crease first.
Stop the scissors on a pencil dot and crease along a ruler before you fold.
What paper weight is best for a pop up birthday cake card?
Use 80 to 120 gsm for the insert and 176 to 216 gsm for the cover. A heavy insert resists the fold and cracks along it.
How many cuts does a birthday cake pop out card need?
Four for two tiers, six for three. Each tier takes one pair of parallel cuts.
Do I need a cutting machine?
No. Scissors, a ruler and a pencil are enough.
A machine only makes the strips more even, and the PDF that comes with the Pop Up Butterfly Birthday Card SVG lets you cut by hand.
Can I fix a torn tier?
One torn tier can be patched with a 1 by 3 cm strip of paper glued inside along the fold. If two tiers have torn, replace the insert.
Is the card flat when closed?
Yes, if every tier passes the close-and-open test before glue. A tier that stays flat or leans is too deep for the insert.
Key Takeaways
- A tier tears at the end of a cut that ran past the fold line, or on a fold made without a crease first.
- The insert wants 80 to 120 gsm paper, and the cover can be 176 to 216 gsm.
- Mark tier depths of 5, 3.5 and 2 cm on the spine, and put a pencil dot at the end of every cut.
- Crease along a ruler before the reverse fold, and do not force a strip that resists.
- Close and open the card three times without glue before anything is stuck down.
- A cut file such as the Pop Up Butterfly Birthday Card SVG takes the hand cutting out.
Would rather skip the hand cutting? See the Pop Up Butterfly Birthday Card SVG.